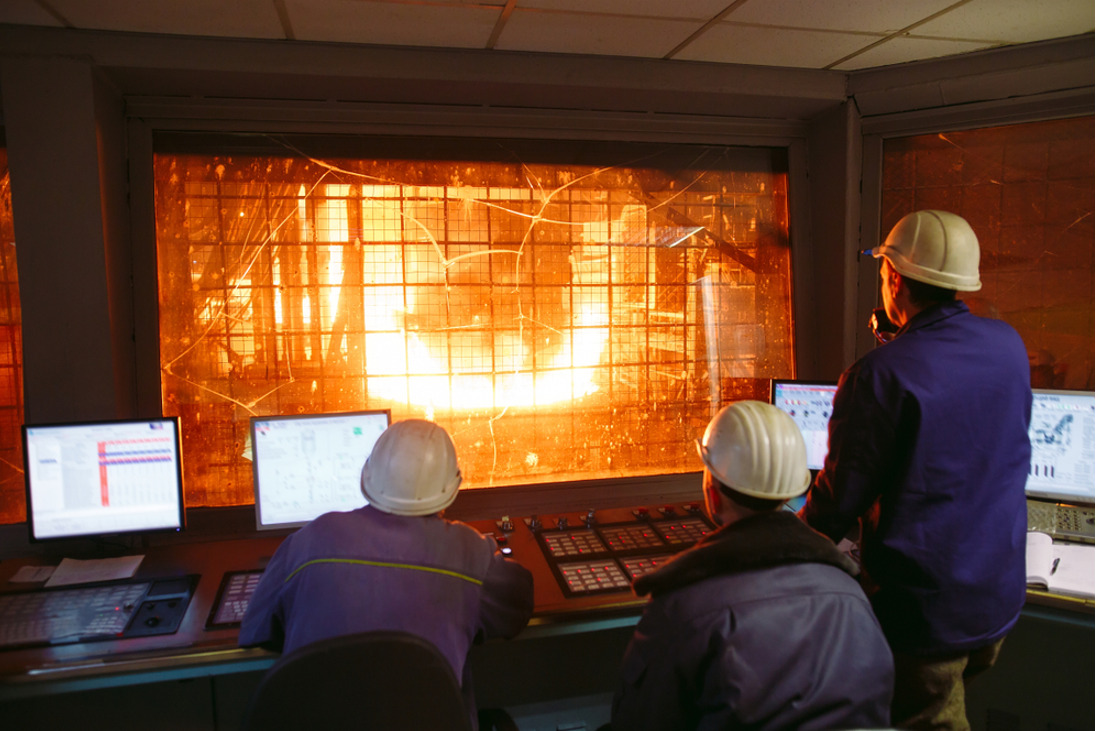
Process Control

Supplier Process Control in Turkey

Stabilize your process

With years of experience in production and quality, we’re ready to examine your supplier process and to take it under control.

-Consulting, Quality Management System and Process Audits, Supplier Evaluation

  • Casting Processes
  • Deformation Processes
  • Molding Processes
  • Machining Processes
  • Joining Processes
  • Heat Treatment Processes
  • Surface Treatment Processes
  • 3D Printing Processes
  • Powder Metallurgy Processes

At Modulus Metal Company, we utilize a variety of techniques to ensure that the metal shaping process is producing high-quality parts consistently. This includes using precision measuring tools to ensure that the dimensions of the finished parts meet the required specifications, as well as performing nondestructive testing (NDT) to identify defects or imperfections in the material. We also perform material testing to ensure that the material meets the required specifications and is suitable for the intended application. In addition, we use sensors and other instrumentation to monitor the metal shaping process in real-time and make adjustments as needed to ensure that the process is running smoothly and efficiently. Finally, we have established quality assurance procedures, including visual inspection, documentation review, and statistical process control, to help identify problems and prevent defects from occurring.

There are several techniques that can be used to control the metal shaping process, including:

  1. Dimensional measurement: Dimensional measurement involves using precision measuring tools to ensure that the dimensions of the finished part meet the required specifications. This includes measuring the dimensions of the part before and after the metal shaping process, as well as checking for surface finish, straightness, and other characteristics.
  2. Nondestructive testing: Nondestructive testing (NDT) methods, such as radiographic inspection and ultrasonic testing, can be used to identify defects or imperfections in the part without damaging the material. This allows for early detection of problems and can prevent costly rework or scrapping of the part.
  3. Material testing: Material testing involves analyzing the chemical and mechanical properties of the material to ensure that it meets the required specifications. This includes testing the tensile strength, hardness, and other properties of the material to ensure that it is suitable for the intended application.
  4. Process monitoring and control: Process monitoring and control involves using sensors and other instrumentation to monitor the metal shaping process in real-time and make adjustments as needed to ensure that the process is running smoothly and efficiently. This can include monitoring temperature, pressure, flow rates, and other process variables.
  5. Quality assurance procedures: Quality assurance procedures, such as visual inspection, documentation review, and statistical process control, can be used to ensure that the metal shaping process is producing high-quality parts consistently. These procedures can help identify problems and prevent defects from occurring.

SERVICE DETAILS

1. Casting Processes

1.1 Sand Casting

       – Key Steps: Pattern creation, mold making, sand packing, metal pouring, and cooling.

       – Important Parameters: Sand quality, mold integrity, pouring temperature, and cooling rate.

       – Characteristics: Versatile, suitable for complex shapes but with lower surface finish.

       – Supplier Control: Monitors mold and sand quality, pouring methods, and solidification patterns.

       – Supervision: Regular audits and NDT to check for sand defects, porosity, and dimensional accuracy.

1.2 Investment Casting

       – Key Steps: Wax pattern creation, ceramic shell formation, dewaxing, metal pouring, and shell removal.

       – Important Parameters: Wax pattern accuracy, shell thickness, preheat temperature, and pour rate.

       – Characteristics: High precision, good surface finish, suitable for complex geometries.

       – Supplier Control: Controls the accuracy of wax patterns and shell integrity.

       – Supervision: Inspects shell quality and uses X-ray or NDT to check internal quality and consistency.

1.3 Die Casting

       – Key Steps: Mold clamping, metal injection, cooling, and part ejection.

       – Important Parameters: Injection speed, mold temperature, pressure, and cooling rate.

       – Characteristics: High dimensional accuracy, excellent surface finish, suitable for mass production.

       – Supplier Control: Oversees die temperature, injection parameters, and cooling methods.

       – Supervision: Conducts inspections for defects like porosity and surface irregularities, and monitors cycle consistency.

1.4 Centrifugal Casting

       – Key Steps: Mold rotation, metal pouring, centrifugal solidification, and cooling.

       – Important Parameters: Rotation speed, mold temperature, pouring rate, and cooling control.

       – Characteristics: High material density, good mechanical properties, suitable for cylindrical parts.

       – Supplier Control: Controls rotation speed, pouring consistency, and mold temperature.

       – Supervision: Uses inspections and NDT to ensure proper density and structural integrity.

 2. Deformation Processes

2.1. Forging

       – Key Steps: Heating, shaping under pressure, and cooling.

       – Important Parameters: Temperature, pressure, die condition, and cooling rate.

       – Characteristics: Produces strong components with excellent grain flow.

       – Supplier Control: Monitors temperature and pressure conditions at suppliers.

       – Supervision: Regular site visits and testing of forged parts for uniformity and defects.

2.2 Rolling

       – Key Steps: Metal feeding, rolling through cylinders, and cooling.

       – Important Parameters: Roll gap, temperature, speed, and lubrication.

       – Characteristics: Produces uniform thickness and improved material properties.

       – Supplier Control: Controls rolling temperatures and speeds, ensuring uniformity.

       – Supervision: Inspects surface finish and dimensional accuracy, and reviews rolling logs.

2.3 Extrusion

       – Key Steps: Heating billet, forcing through a die, and cooling.

       – Important Parameters: Temperature, extrusion speed, die design, and cooling rate.

       – Characteristics: Creates complex cross-sectional profiles with good surface finish.

       – Supplier Control: Manages die conditions, extrusion speed, and cooling processes.

       – Supervision: Inspects extruded products for consistency, dimensional accuracy, and surface defects.

3. Molding Processes

3.1 Injection Molding

       – Key Steps: Material melting, injection into molds, cooling, and ejection.

       – Important Parameters: Injection pressure, mold temperature, cooling time, and material flow rate.

       – Characteristics: High production speed, accurate dimensions, suitable for complex shapes.

       – Supplier Control: Controls material quality, mold conditions, and injection parameters.

       – Supervision: Regular monitoring of injection settings, part inspections, and defect analysis.

3.2 Compression Molding

       – Key Steps: Material placement, mold clamping, heating, and cooling.

       – Important Parameters: Temperature, pressure, molding time, and material distribution.

       – Characteristics: Ideal for large, flat parts with good mechanical strength.

       – Supplier Control: Manages mold pressures, temperatures, and material flow.

       – Supervision: Inspects for uniformity, thickness, and checks mold cleanliness.

4. Machining Processes

4.1 Milling

       – Key Steps: Material securing, tool rotation, cutting, and finishing.

       – Important Parameters: Spindle speed, feed rate, depth of cut, and tool wear.

       – Characteristics: High precision, suitable for complex geometries.

       – Supplier Control: Monitors tool condition, cutting speeds, and feed rates.

       – Supervision: Conducts dimensional inspections and surface finish assessments.

4.2 Turning

       – Key Steps: Material rotation, tool engagement, shaping, and finishing.

       – Important Parameters: Rotational speed, tool feed rate, and depth of cut.

       – Characteristics: Produces cylindrical parts with high accuracy.

       – Supplier Control: Oversees machine settings, tool conditions, and workpiece alignment.

       – Supervision: Inspects for surface finish, dimensional accuracy, and checks for tool wear.

 5. Joining Processes

       – Key Steps: Joint preparation, welding, cooling, and inspection.

       – Important Parameters: Heat input, welding speed, material compatibility, and filler material.

       – Characteristics: Strong joints, suited for various materials and thicknesses.

       – Supplier Control: Manages heat input, welding conditions, and material handling.

       – Supervision: Uses NDT methods like X-ray or ultrasonic testing to verify joint integrity.

6. Heat Treatment Processes

6.1 Annealing

Key Steps: Heating metal to a specific temperature, soaking, and slowly cooling.

Important Parameters: Temperature, soak time, and cooling rate.

Characteristics: Reduces hardness, improves ductility, relieves internal stresses.

Supplier Control: Modulus Metal ensures precise control of heating and cooling rates.

Supervision: Verifies mechanical properties through hardness tests and microstructure analysis.

6.2 Tempering

Key Steps: Reheating quenched metal to a lower temperature and cooling.

Important Parameters: Tempering temperature, duration, and cooling rate.

Characteristics: Reduces brittleness, increases toughness while maintaining strength.

Supplier Control: Controls reheating cycles to achieve desired mechanical properties.

Supervision: Inspects tempering uniformity and verifies through mechanical testing.

6.3 Case Hardening

Key Steps: Carburizing or nitriding to add carbon or nitrogen to the surface, followed by quenching.

Important Parameters: Depth of hardening, temperature, time, and quenching method.

Characteristics: Hardens the surface for wear resistance while keeping a tough core.

Supplier Control: Ensures consistent surface composition and hardening depth.

Supervision: Uses surface hardness tests and microhardness profiles to confirm case depth.

6.4 Normalizing

Key Steps: Heating above the critical temperature, soaking, and air cooling.

Important Parameters: Normalizing temperature, soak time, and cooling rate.

Characteristics: Refines grain structure, enhances toughness, and relieves internal stresses.

Supplier Control: Controls heating to ensure uniform grain structure across components.

Supervision: Inspects microstructure and tests mechanical properties for uniformity.

6.5 Stress Relieving

Key Steps: Heating to a lower temperature, holding, and cooling slowly.

Important Parameters: Stress-relieving temperature, time, and cooling rate.

Characteristics: Reduces residual stresses without significantly altering mechanical properties.

Supplier Control: Controls temperature and time to ensure stress reduction without distortion.

Supervision: Monitors process parameters and verifies stress relief through dimensional checks and mechanical testing.

6.6 Quenching

Key Steps: Heating to austenitizing temperature, soaking, and rapid cooling (quenching).

Important Parameters: Quenching medium (water, oil, air), temperature, and agitation rate.

Characteristics: Increases hardness and strength, but can induce internal stresses.

Supplier Control: Manages quenching parameters to control cooling rates and minimize distortion.

Supervision: Inspects for hardness uniformity and checks for cracking or distortion post-quenching.

6.7 Hardening

Key Steps: Heating to a critical temperature, soaking, and rapid cooling.

Important Parameters: Hardening temperature, soaking time, and quenching medium.

Characteristics: Enhances wear resistance and strength through martensitic transformation.

Supplier Control: Oversees the precise control of heating and quenching cycles.

Supervision: Verifies hardness levels and inspects for structural uniformity using NDT techniques

7. Surface Treatment Processes

       – Key Steps: Surface preparation, electroplating, rinsing, and drying.

       – Important Parameters: Bath composition, current density, temperature, and plating time.

       – Characteristics: Provides corrosion resistance and enhanced aesthetics.

       – Supplier Control: Controls bath conditions and plating thickness.

       – Supervision: Regular inspections for uniformity, adhesion, and coating integrity.

8. 3D Printing Processes

       – Key Steps: Layer-by-layer deposition of material, cooling, and part removal.

       – Important Parameters: Print speed, temperature, layer thickness, and material flow rate.

       – Characteristics: Ideal for rapid prototyping with moderate strength and surface finish.

       – Supplier Control: Oversees print conditions, material quality, and build consistency.

       – Supervision: Evaluates printed parts for dimensional accuracy, layer adhesion, and surface finish.

9. Powder Metallurgy Processes

       – Key Steps: Powder mixing, pressing into shape, and sintering in a furnace.

       – Important Parameters: Powder size, compaction pressure, sintering temperature, and atmosphere control.

       – Characteristics: Produces parts with good material utilization, uniform properties, and tailored porosity.

       – Supplier Control: Manages powder quality, pressing conditions, and sintering atmosphere.

       – Supervision: Inspects sintered parts for density, mechanical properties, and porosity uniformity.

Modulus Metal’s comprehensive approach ensures that every aspect of the supplier’s processes is meticulously controlled and supervised, with a focus on maintaining high-quality standards and meeting customer specifications.